Feb 06
A car lettering design in Illustrator
Posted by Benedikte Vanderweeën on 06/02/2012
In this little tutorial, i’ll guide you through the design process of a car design i made for a local company.
Because this company bought some cars, they wanted a design on the car that related to the website and to the companies “corporate identity”.
So, i made a design in Illustrator based on the logo with a gradient in it and some other repeating elements. Starting from this artwork, i searched for the right car model and downloaded the vector file.

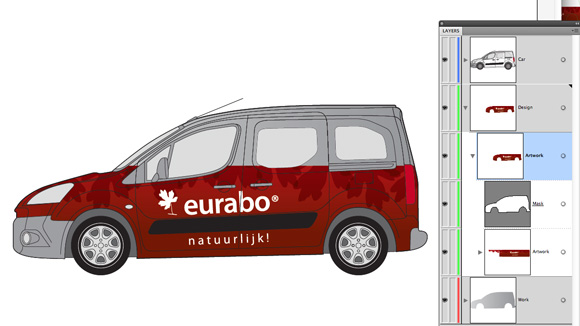
The final lettering on the car
The artwork vector process
Placing the artwork on the vector car.
Before you start working on a simulation design, make sure all the files you need are in vector format because this artwork has to scale up to real car dimensions without quality loss. I made sure i had the logo in vector format, i made the artwork for the car in vector and searched for the right car model in vector so i could make sure my simulation was correct when i presented it.
preparing the working file with the correct layers
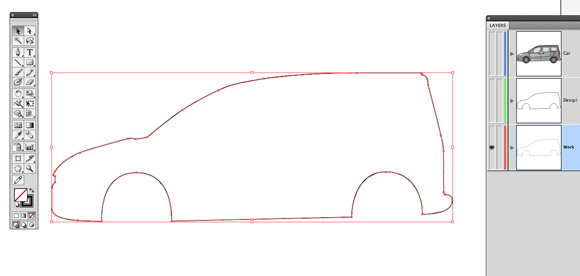
- Open the vehicle template in Illustrator
- Open the layer options and rename the layer to "Car"
- Create 2 new layers: "design" and "work", Arrange the layers so the "Car" layer is on top, "design" layer is beneath and "Work" in under these 2.
- Select the "Car" layer and use the direct selection tool and click on the car, choose "none" as the fill colour and copy to the clipboard. Hide the layer by clicking on the eyer icon.
- Next, select the "design" layer and paste the contents of your clipboard using cmd + F (at the same position). This element is used as a mask later on. Deselect it for now.
- Select the "work" layer and paste your clipboard again by using cmd + F.
- Now we have all the layers ready to import the artwork and start the design
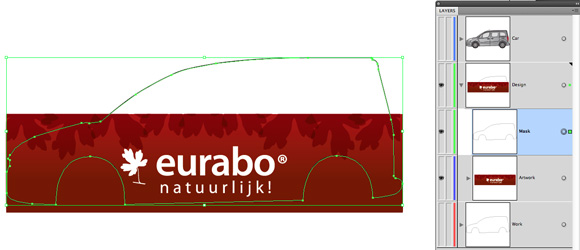
placing the artwork on a sublayer under the mask
- Open your artwork for the car. Open all elements: like gradients, the logo and other elements.
- Copy the elements on the "design layer"
- Make sure, the mask layer (the contour of the car) is always on top
placing the artwork on a sublayer under the mask
- Make sure all the design elements are in the right position
- select the mask and the design elements, In the Object menu, choose Mask > Make or use the cmd key + 7
- Select the "work" layer and specify the paintwork color.
- Display the "Car" layer again.
placing the artwork on a sublayer under the mask
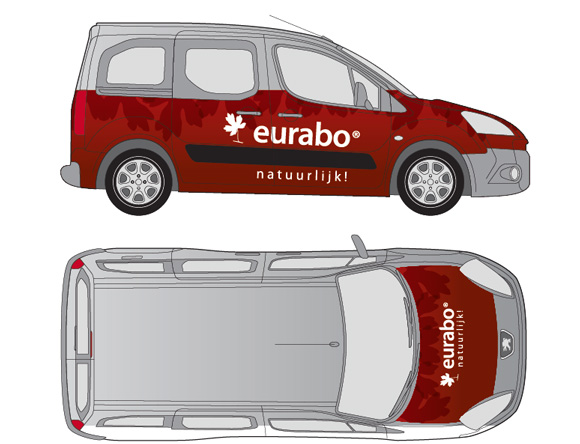
Make sure you make all sizes of the car with a top view if you place artwork on top of you car.
You will have to ask your print provider the scale of the artwork. You must also consider a bleed area. The vector car is scaled (a scale of 1/30), place it at 3000% if you want to see the artwork in real dimensions.
The finished Illustrator file
This is the finished Illustrator file that i exported into a printable, certified PDF and gave to the print provider.
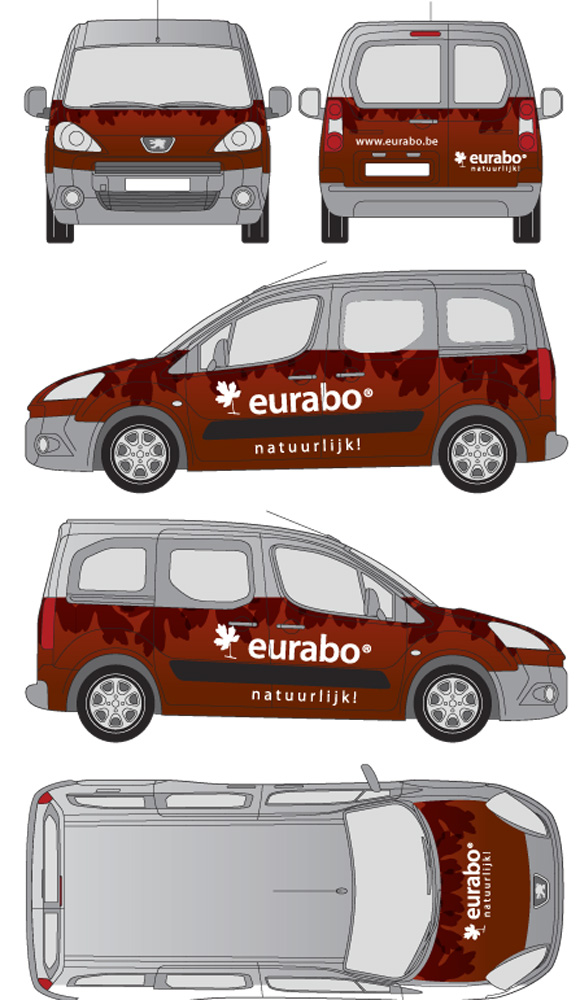
The finished vector illustrator file

Connect