Sep 02
Using the Crop tool in Illustrator CS3
Posted by Benedikte Vanderweeën on 02/09/2008
After your artwork is finished in Illustrator, you often need to change the dimensions of your image. You can crop a teaser from an illustration to use for publication on a website. The crop tool in Illustrator is very helpful.
Looking a little closer at the Crop tool
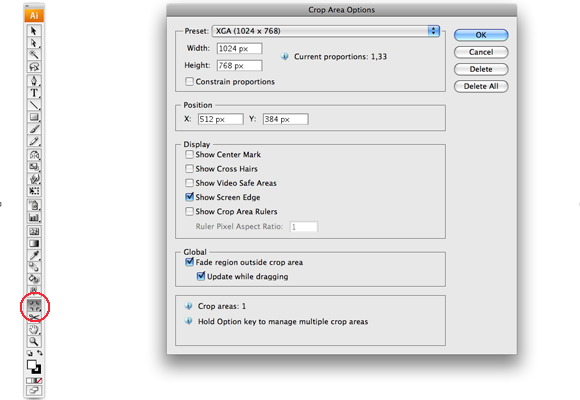
The Crop tool can be found in the toolbar, double-clicking the tool will open the preferences of this tool
- Preset: choose your preset to the size you want to crop your artwork, the list is filled with presets but your can add your own dimensions by filling in the Width and Height box, click the Contrain proportions if you want this
- Position: give the X and Y position from where the crop has to start
- Display: you can use some display marks for better understanding where the center of your crop is, rulers, screen edge, etc...
- Global: this is a preset for fading the screen outside the crop area
- Click OK when your Options are set
Cropping an Illustration

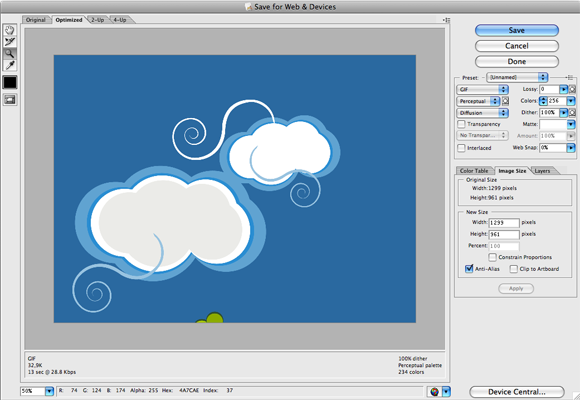
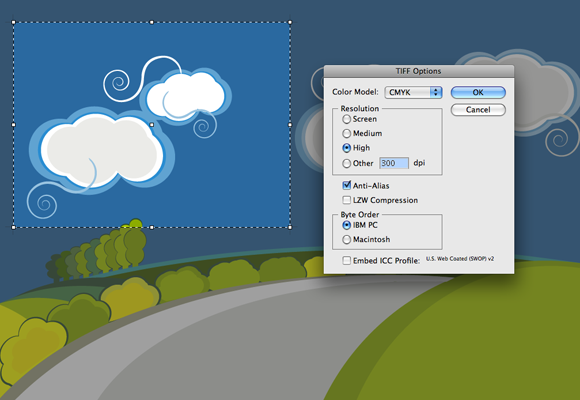
When cropping an image, you can decide to add an additional area to your crop area: start dragging outside the current crop area and hold down ALT/OPTION, then click and drag to create a second area. The active crop area will be used as active area for the output crop. Here you can choose the destination for you illustration: Choose File > Save for Web and Devices, as well as File > Export. Set your options to save your image for web or print. Be sure when saving for the web that the "Clip to Artboard" is NOT checked! Only the output crop will be exported.
Saving for web settings
Saving for print settings
Your original image will not be affected by this crop! this is very useful because you can open a base version of your illustration at anytime and extract croppings from it.

Connect