Aug 07
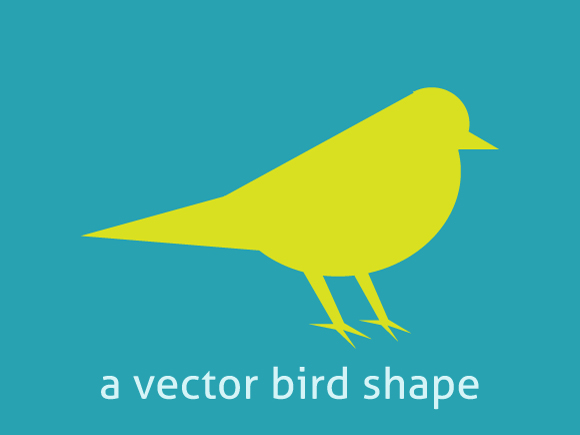
Creating a vector bird shape
Posted by Benedikte Vanderweeën on 07/08/2009
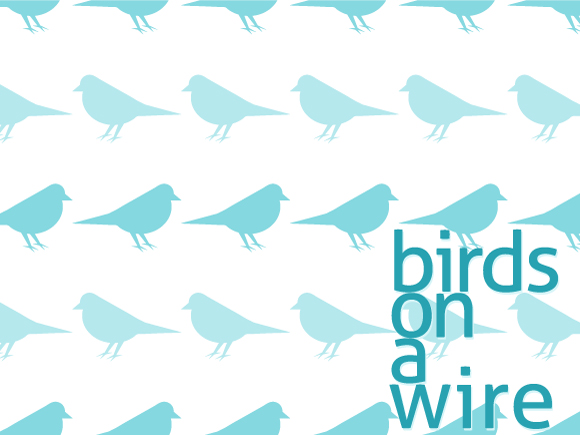
A bird shape is not that difficult to draw with regular shapes in Illustrator. With a circle, a rectangle and a oval you’ll get a bird shape really quick. I’ll show you how I did this in Illustrator and made a wallpaper with this bird shape.
Step 1: Make a sketch or start from scratch
You can make a sketch and scan this. Open it in Illustrator and make a template layer from the sketch layer. You can make it even more simple and start from scratch.
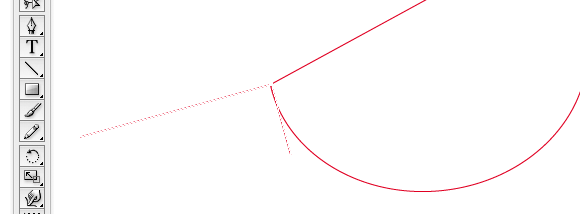
Step 2: Draw a circle and ellipse
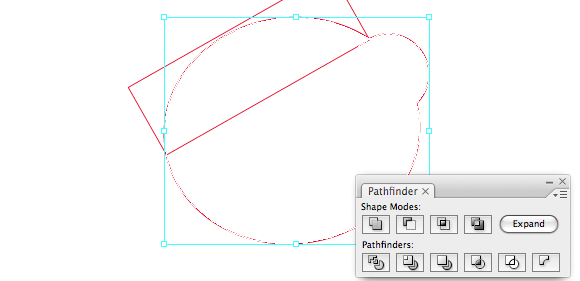
Create a new document (choose 800x600px for web, RGB mode). Start by selecting the Circle Tool in the toolpalette en hold down the Shift tool while drawing the circle in the middle of the document. Next, draw an ellipse that overlaps the circle. Select the rotate tool and rotate the ellipse by dragging the lower right anchor point (see image). Choose the Pathfinder palette (Window > Pathfinder) and select both the ellipse and circle. Next, click the "Add to shape area" in the Pathfinder palette and click "Expand".

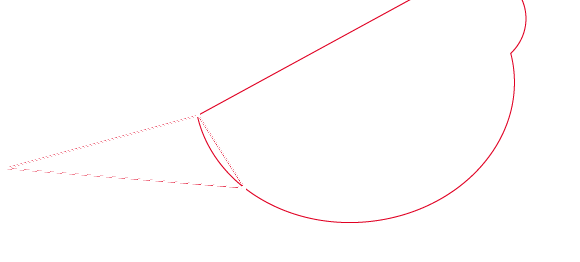
Step 3: Refining the bird body shape with rectangle tool
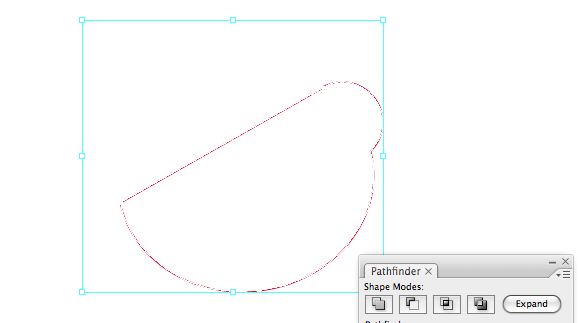
In the tool palette, select the Rectangle Tool (shortcut M) and draw a rectangle over the ellipse shape, next select the rotate tool or press R on your keyboard and rotate the rectangle till both the lower anchor points intersect with the ellipse tool as shown in the image below. Select both the rectangle and the ellipse shape of the bird's body and choose your Pathfinder palette. With both the shapes selected, press the "Subtract from shape area" and click "Expand".
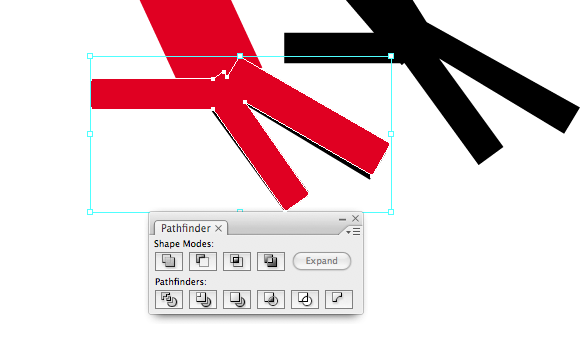
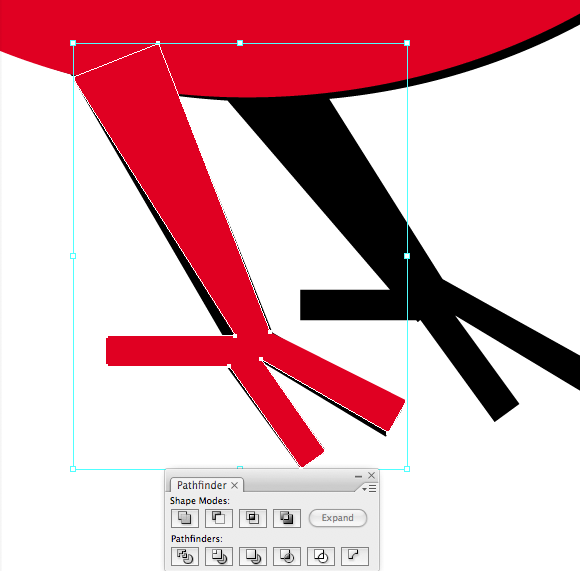
Step 4: drawing the tail of the bird with a triangle shape
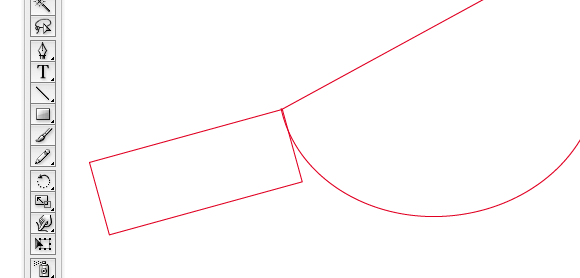
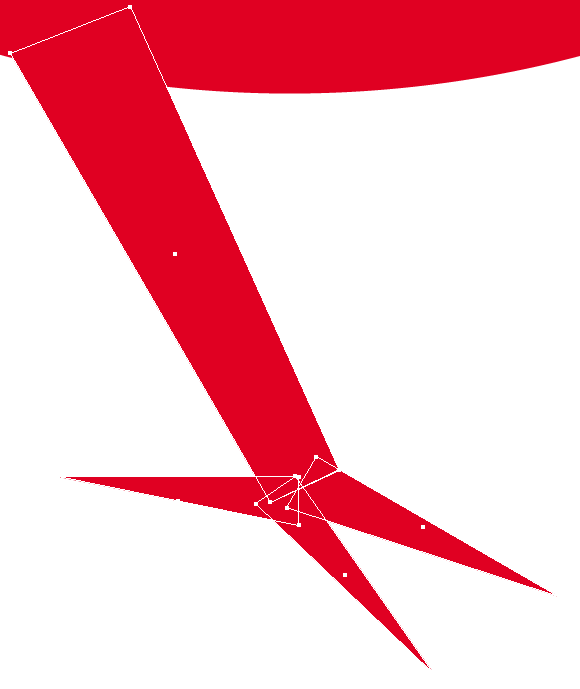
Again, select the rectangle tool in the tools palette and draw a rectangle at the right end of the body shape. Select the rotate tool and rotate the rectangle as in the image below. Select the "Direct Select Tool" (shortcut A) and drag over the lower right anchor point and press the "Delete" button to reshape the rectangle to a triangle. With this shape still selected, click Cmd + J to join the two endpoints and close this shape.
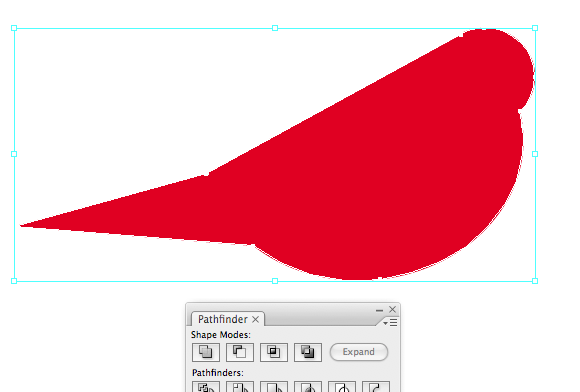
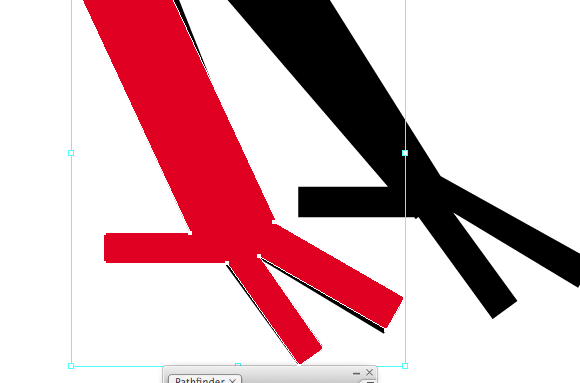
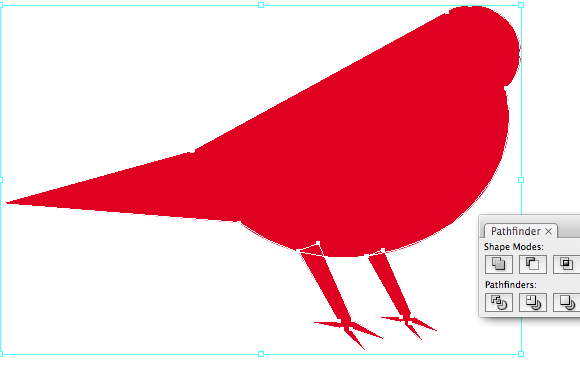
The bird shape should look similar to this:
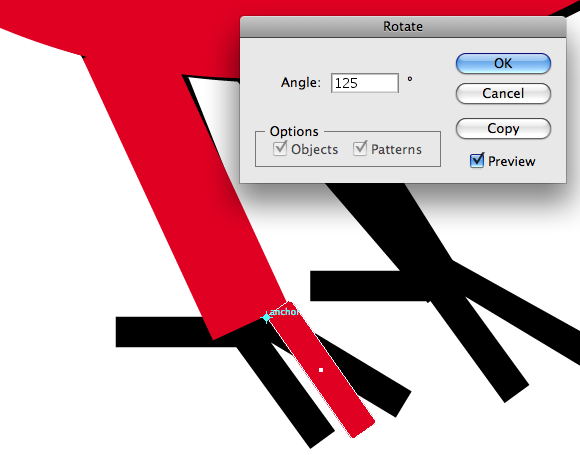
Step 5: drawing the paws shapes
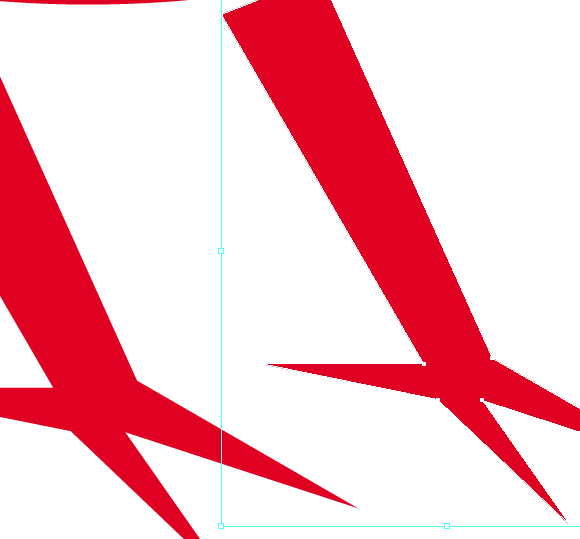
Next, select the rectangle tool and draw a rectangle shape under the body. Select the rotate tool or press R. Next, draw another rectangle and select the rotate tool. Alt+click on the upper left anchor point of the rectangle. The rotate field will pop up. Type 125 in the Angle field and click the "Copy" button. Do this another time and type "25" in the Angle field for the third paw and click "Copy" again. Now arrange the rectangles a bit with the Selection tool.
Step 6: make triangles from the rectangles
Select the direct selection tool or press "A". Drag over the lower right anchor point of the first paw and press the Delete button to subtract an anchor point from the rectangle, click Cmd + J to close the path, do this 2 times more for the other paws and click Cmd + J to join the anchor points. Select the 3 rectangles and click the "Add to shape area" in the Pathfinder palette. Select the upper rectangle and the paws rectangle and click again the "Add to shape area" and click the "Expand" button in the Pathfinder palette. Next we'll duplicate this paw to create the right paw. Select the whole paw and hold down the Alt key while dragging, hold the Shift key to line it up with the first paw. Next drag the lower right anchor point to scale this paw a bit. Next select both paws and click Ctrl + G to group them. Select the body and the paw shape and click the "Add to shape area" in the tool palette.
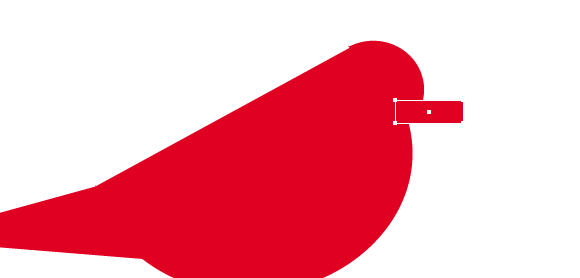
Step 7: finish the bird shape by adding the mouth
The bird's mouth is again a rectangle shape with 1 anchor deleted. So select the rectangle tool and draw a rectangle for the mouth. Next, select the direct selection tool and select the upper right anchor point of the rectangle and press the "Delete" button. Next, select the right upper anchor point with the direct selection tool and drag this anchor point a bit to the right so it matches the shape of a mouth. Click Cmd+J to join the endpoints of the rectangle. Add this shape to the body by clicking the "Add to shape area" in the pathfinder palette
Step 8: finish the bird by giving it a color
Now that the shape of the bird is finished, you can select it and give it a nice color. You can tweak a little further to optimize the shape. This can be done by selecting the direct selection tool and clicking an anchor point to adjust the curve of the path.
So, I hope you enjoyed this tutorial a bit. You can always download stock vector images, but it's always nice to do it (or at least try it) yourself.

Connect