Jan 14
Making a favicon with IconBuilder
Posted by Benedikte Vanderweeën on 14/01/2009
How to make a transformation of a logo into a favicon in a browser window?
How exactly do you define the area to show in your favicon? And how do you built a quality favicon, and implement the code into your document? I’ll explain in this article. I prefer to use the Photoshop Filter IconBuilder by Iconfactory.
What are Favicons?
Favorites Icon: An icon related to a particular web site or page that can be displayed in a web
browser’s address bar, next to a web site’s name in the favorites/bookmarks list, and next to
a web page’s title. Favicons are stored in the standard ICO file format and just about
any image that is 16x16 pixels or larger may be used. Favicons are supported by many web
browsers including recent versions of Safari, Internet Explorer, Firefox, Mozilla, Konqueror, and
Opera. However, not all browsers support the same resource depths.(from Iconfactory)
Here are a few examples:


Preparing your logo for use in Photoshop with Iconbuilder
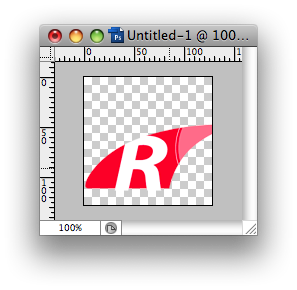
Before I import the logo into Photoshop, I define an area in the logo that will be used in the favicon. Here, the first letter and symbol of the business name will be used. Using the complete logo will not be readable in a 16 x 16 pixels wide icon.

Choosing a predefined Iconbuild template
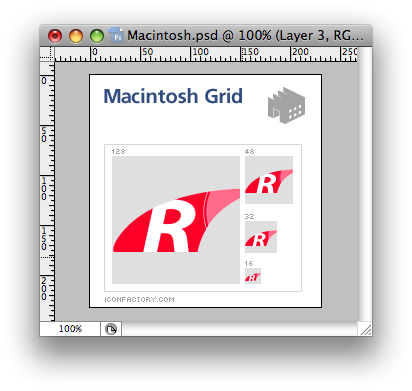
First, I open my logo in Illustrator and set the dimensions to the dimensions I will use in the biggest version of the icon, in this case 128 x 128 pixels. Iconbuilder has a few example files where you can drop your logo on a new layer and adjust your logo to the indicated dimensions, here I used the Macintosh.psd file and made a new layer on top.
Creating the icons
After the logo is placed into the template with the correct dimensions, do the same for the rest of the predefined places, here in this case we have to place our logo in dimensions 16x16, 32x32, 48x48 and 128x128 pixels. Make sure all logo's are merged to 1 layer in Photoshop. Then go to the menu bar and choose: Filter > IconFactory > IconBuilder, the following screen will appear:
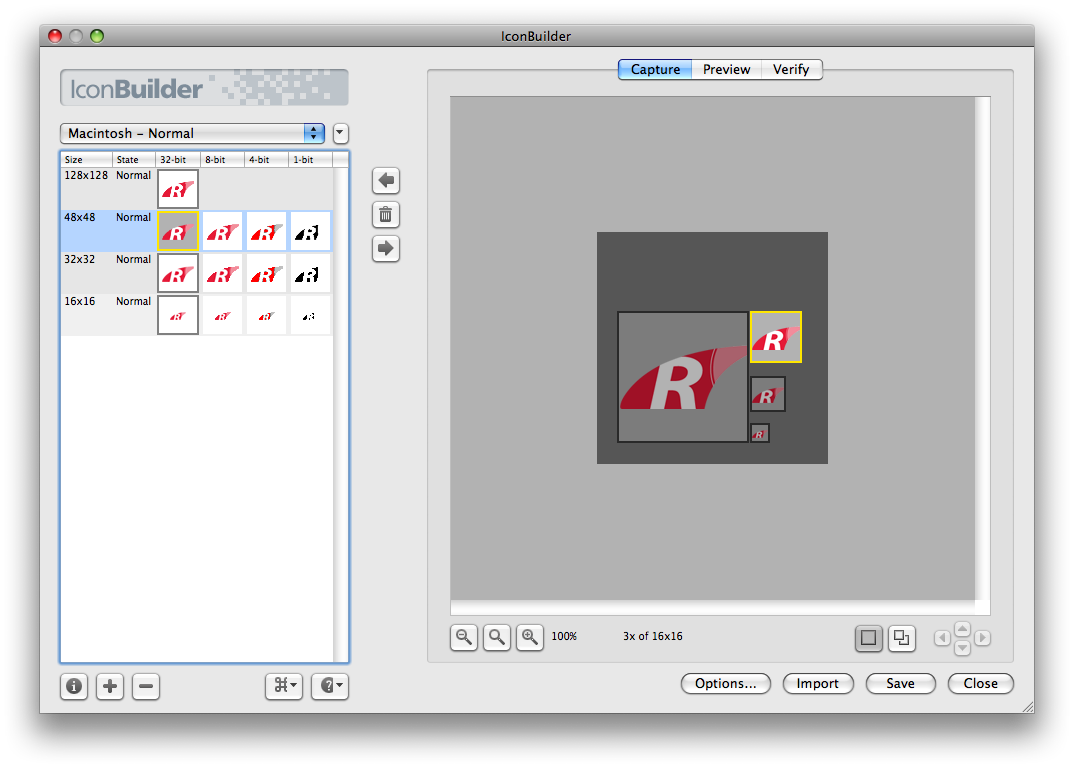
Click in the Presets Menu and select Macintosh – Normal. Click on the arrow in the middle, the BUILD arrow to make the icons in the left pane.
Click the Save button, the following window will appear, check or uncheck the file formats you prefer, a new folder will be created and all icons will be stored within this folder, also the Folder Icon.ico that will be used as the Favicon file.

Putting the right code into your HTML document
Open your index HTML document to paste the correct code into it. I had some difficulties with previous code to display the Favicon into the Safari Browser, so I looked it up and came to this code for displaying the Favicon correct at: http://developer.apple.com/internet/safari/faq.html#anchor7
<link rel="icon" href="favicon.ico" type="image/x-icon" />

<link rel="shortcut icon" href="favicon.ico" type="image/x-icon" />
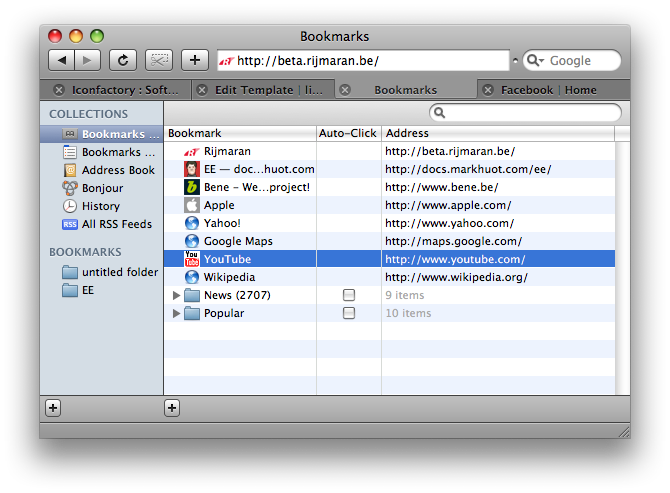
Viewing the result:
Make sure you put the Favicon.ico file into the root directory of your website and test if the icon displays correctly in your browser .

Connect