Jun 30
Tracing a drawing with the pen tool in Illustrator
Posted by Benedikte Vanderweeën on 30/06/2008
In this tutorial we"ll trace a scanned drawing with the pen tool in Illustrator. The image will be used as a vector illustration and icon. We will only draw half the part of the figure and flip the other part so that we have a 100% symmetric object/character. By drawing just a half, we’ll save some time. (you can import a sketch to work on). Feel free to post your sketches or drawings to the Flickr group Sketch and Draw.
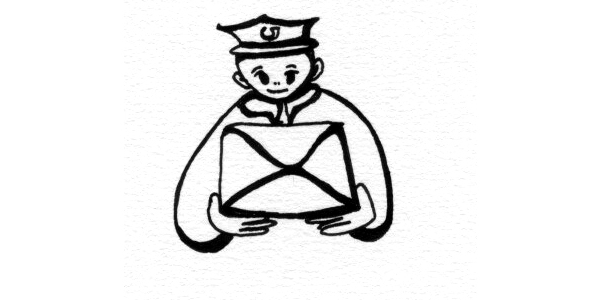
Finalized version of scanned drawing

This is what we are going to trace with the pen tool in Illustration.
Step 1: Importing the drawing as a template
This is the drawing that we will import into Illustrator as a template. Open Illustrator and choose File > New, choose a web layout and give dimensions of 500px x 500px. Import the scanned image into Illustrator by clicking File > Place, check the option Template. Illustrator will place your drawing on a separate layer and lock it. There will also be a new layer for tracing the image. Then click the Place button. Give your new layer a name. Make 5 additional layers and name them as follow:
- body
- hands
- head
- hat
- enveloppe
Go back to your work area and click cmd + R to show the Rulers.
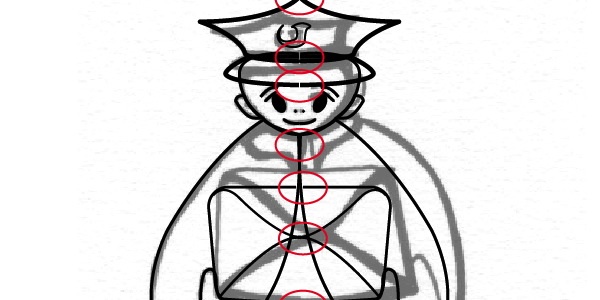
Step 2: Placing the Rulers into your drawing
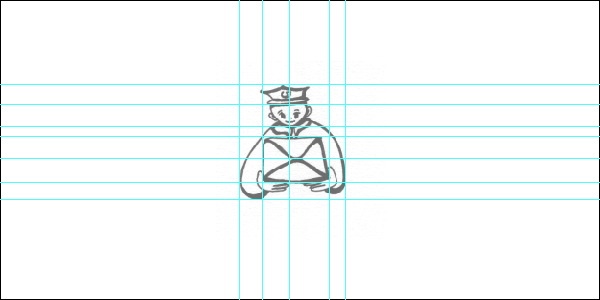
Drag a vertical ruler from the left ruler bar into your drawing by dragging and not releasing your mouse button. Place the ruler in the middle of your drawing. Add 2 additional rulers to the left and the right part of your figure. Drag a horizontal ruler to the top of the figure and another ruler to the bottom of your figure. Place the other rulers to separate the head, the body, the hands and the enveloppe.
Step 3: Drawing the left part of the figure
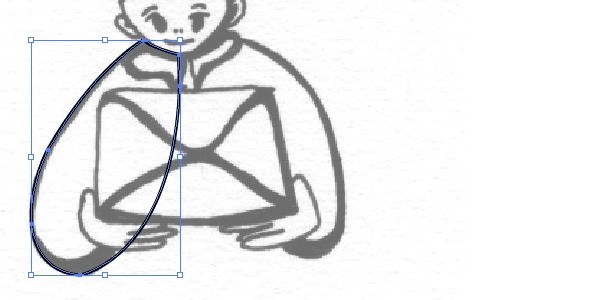
Select the pen tool and start by clicking your first anchor point in the top middle of the ruler of the body, we will first draw the body. Drag and select to the left and click to add the second anchor point. Continue to draw the left part of the body and click the first anchor point to close your body path.

Continue the left part of the figure by making closed paths of the left hand, the left part of the enveloppe, the left part of the face and the left part of the hat. You should have these parts:
Step 4: Reflecting the left part to the right
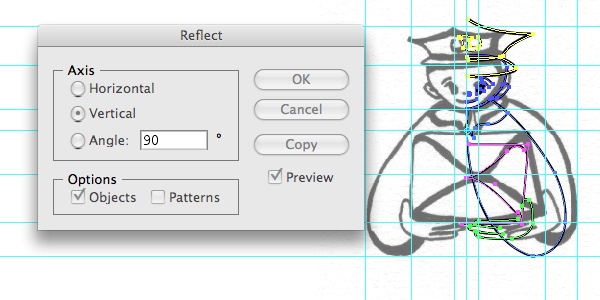
When we have finished the left part of the drawing, we'll flip the whole left part to the right by using the reflect tool (O). First, select all the parts by choosing Select > All (cmd + a). Select the reflecting tool and Alt + click somewhere in the middle ruler. The reflect dialog box will appear, choose Axis: Vertical, check the Preview box to see if the flip is right and click Copy. You will now have 2 parts: the left and the right part of the figure. Now, we will have to join the open anchor points to be able to color the figure.
Step 5: Joining the left and right part

Now we have 2 separate parts that need to be joined. Start by selecting the 2 anchor points of the top enveloppe part by selecting the direct selection tool. Lock the other layers to prevent selecting anchor points of the other parts. First click on the anchor point, hold down Shift and click on the other point. Select Object > Path > Join. Do the same for the bottom anchor points of the enveloppe. Repeat these actions for the other parts: the head part and the hat part (the body parts and the hands don't need to be joined). Now you should be able to select the part as a whole. You can check this by selecting a foreground color and give the part a color.
Step 6: Finish the figure by joining the other anchor points
Once you have joined all open anchor points, you should be able to select the part as 1 part and give it a fill. You can now color the figure and apply some style to it, you can give the figure a drop shadow or outer glow. Select each part to give it a different color.
Feel free to adjust and apply other styles to it.

Connect