06 October 2010 · Benedikte Vanderweeën
Making fabric textures in Illustrator
I like the textured backgrounds and wondered how i would make these. Till now, I used to search for textured backgrounds and scan them in. Because this is very time-consuming, I experimented a bit with Photoshop and Illustrator to look for some similar results. First I did an attempt in Photoshop but then i switched doing it in Illustrator to see how i could accomplish a similar texture effect but more scalable. I show you the result here and the steps that took me to come to the result. You could use it as backgrounds (tile) or as wallpapers.
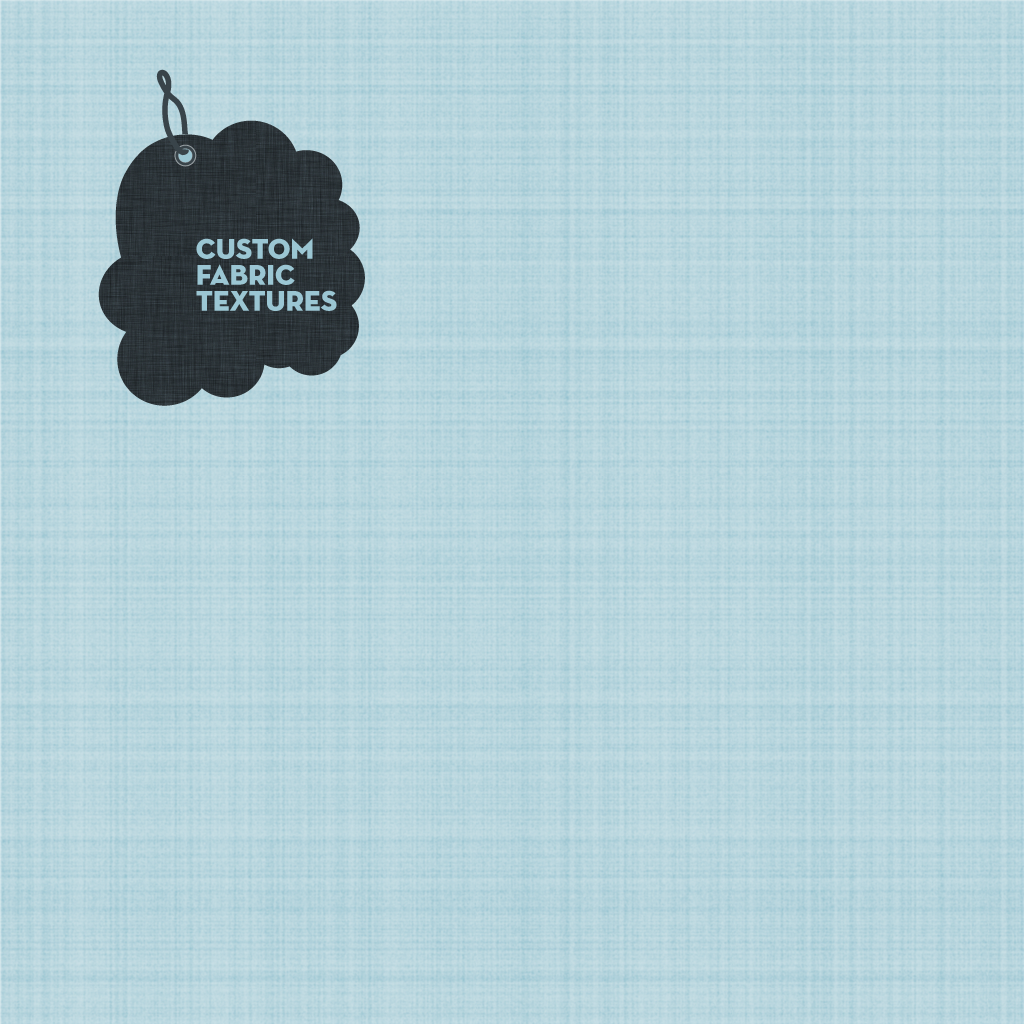
Final illustration fabric textrue
I made 2 versions for the background wallpaper. The light blue version is the one that I describe here step by step:
Light blue version
Dark version

download the iPad wallpaper

Step 1 : make a new file
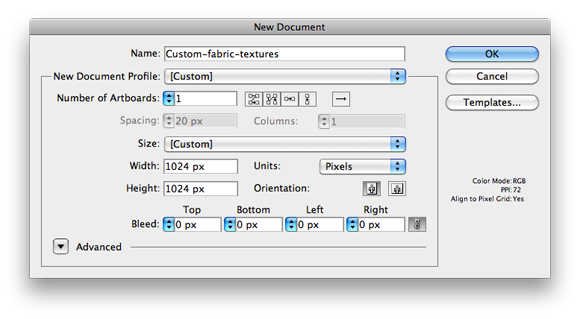
Open Illustrator (i use CS5 but this should work for CS4 as well) and make a new document. Select "Web" from the select list "New document file", give the document a height of 1024 pixels and a width of 1024 pixels (portrait and landscape orientation) all the other settings are ok so click OK.
Step 2 : setting the background color
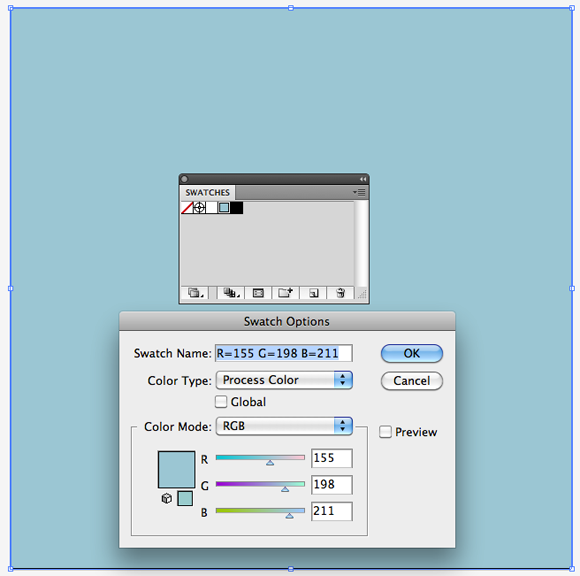
Next select the Rectangular Tool (M) and click in the canvas, the Rectangle pop-up will appear, type 1024 for width and 1024 for height and click OK. Open the Swatches palette (Window > Swatches). Click the "new swatch" in the palette and select a light blue color (R:155, G:198, B:211). Make sure the rectangle is filled with the blue and give it no stroke. Double click the only layer in the Layers Palette and give it the name "Light blue"
Step 3 : adding 2 new layers
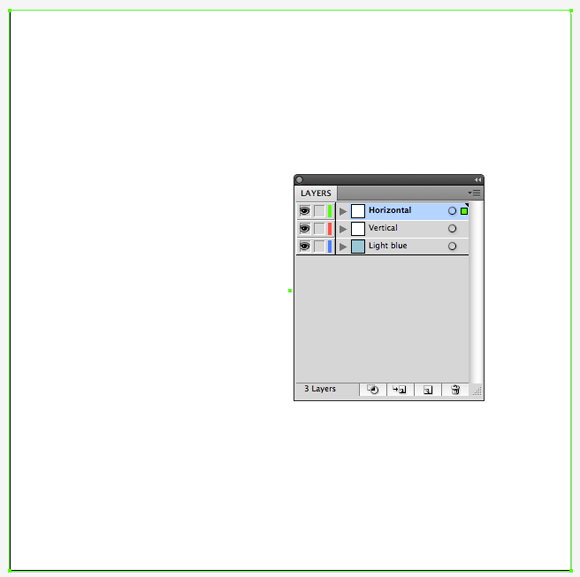
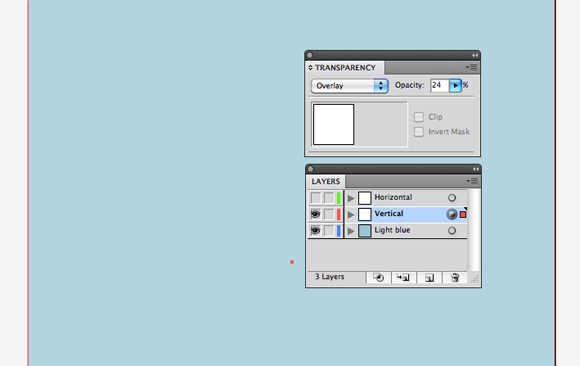
Next add 2 layers on top of the "Light blue" layer and name them "Vertical white" and "Horizontal white". Select the rectangle by clicking on it and paste this layer (Ctrl + F) on the "Vertical white" layer. Give this layer a white foreground color with no stroke. Select this rectangle and paste it on the "Horizontal" layer. Select the first white rectangle by clicking on it. In the menu bar, select Window > Transparency and choose "Overlay" from the blending modes and type 24% for opacity. Do the same for the other white rectangle.
Step 4 : applying the Grain effect
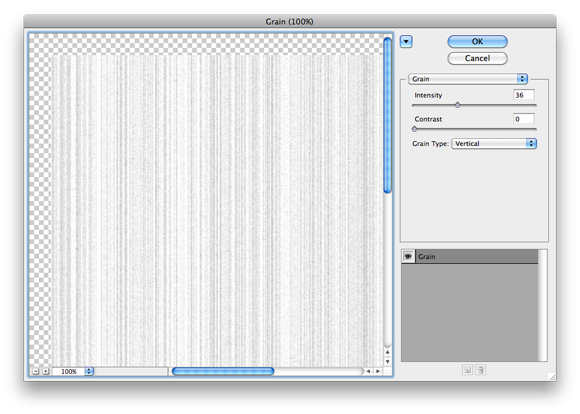
Select the rectangle in the "Vertical" layer and choose Effect > Texture > Grain. The "Grain" window will pop-up and you will see a preview of the effect you are about to apply. On the left, type 36 for Intensity and 0 for Contrast and Vertical for Grain Type and click OK. Do this again for the "Horizontal" layer but select "Horizontal" for the Grain Type.
Step 5 : adding more effect
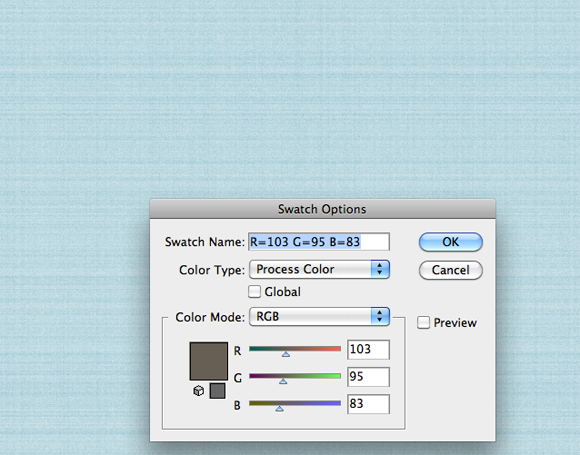
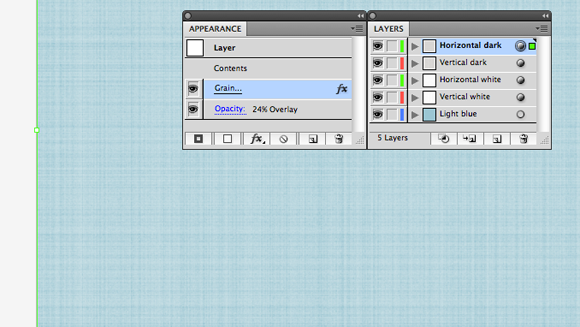
To add some more noise and grain effect, select both the "Horizontal" and "Vertical white" layer and drag them to the "New Layer" icon to duplicate them. Once duplicated, name them "Vertical dark" and "Horizontal dark". Next, select the "Vertical dark" rectangle and change the foreground color to a dark brown, I used the R: 103, G: 95, B: 83. Change the color for the "Horizontal dark" rectangle. Open the Appearance Panel (Windows > Appearance) and click the "Grain" effect to adjust the settings. Adjust the sliders to your liking and click Ok to apply the changes.
Step 6 : finalizing the pattern
Once you made a pattern with the effect tool, you can apply this as a tiled background for a website. Or you adjust the dimensions for a wallpaper. The flexibility of the Illustrator file is that you can apply different dimensions (iPad, iPhone, Mac, other devices, etc...) all in 1 document with the new "Artboards" panel.
If you have suggestions or want to submit your texture result, please do in this Flickr group I recently found: iPad Wallpaper, thanks!