May 04
Creating and exporting icons for mobile use
Posted by Benedikte Vanderweeën on 04/05/2011
Some time ago, i prepared the creation of some mobile icons for the Android platform. Before i started the creative process, i read the Android documentation about creating these icons. In this short tutorial, i’ll explain my work method for creating and exporting these icons.
I used Adobe Illustrator for the creation of the original artwork, and imported the artboards into Photoshop. From there, i automated the export to all the different sizes that were required for the mobile application. In my work that i do on a daily basis, i rarely use the automate function in Photoshop, i'm not a photographer, so mostly i do things once or twice and never need to automate much of my work. But in this case, i was glad i could use it for the icon size export.
Creating the original Illustrator file
I made the original artworks in Adobe Illustrator because the of the flexible export solutions you have, the fact that the original artwork is vector based and most importantly, the combination between the use of layers and the use of the Artboards.
Create your original file big enough to be able to work comfortably, in my case i created a first artboard with dimensions 864 x 864 pixels. I used this number because the exported icons needed to be 72 x 72 pixels (referred to as hdpi, high resolution), 48 x 48 pixels (referred to as mdpi, medium resolution) and 36 x 36 pixels (ldpi, low resolution). I used 864 by 864 pixels as my canvas size because it is a common denominator of 72, 48 and 36 pixels, the goal dimensions for the icons and it gives me the luxury to work big.
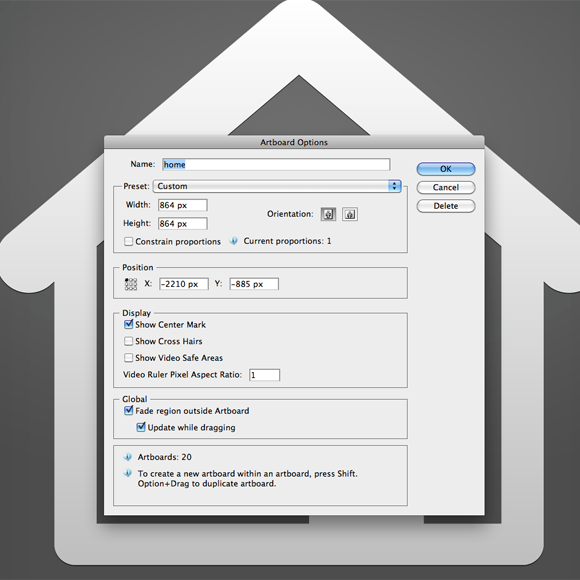
make your original canvas size big enough to work
Targeting the end formats.
Before I started making the icons, i made sure i had a directory named "assets" and 3 subdirs named "hdpi", "mdpi" and "ldpi". These folders contain the final exported icons and will be the destination folders for the artwork. The filenames (of the icons) will be identical in all 3 folders.

Creating the destination folders
Using artboards
Once i started in Illustrator, for each icon I made a different artboard. Artboards are new in Illustrator CS5 and extremely useful for working with more than 1 canvas. The flexibility of artboards is that you can give each artboard its own dimensions and that you can export them separatly or all in one export. You have a nice, structured overview of your artwork in own place and that is just nice to work.
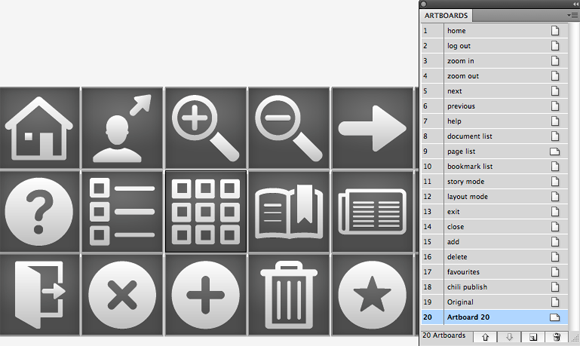
creating as many artboards as icons in Illustrator
In my case, each icon has the same dimensions, so each artboard is identical. For each icon, i made a separate layer with 1 common background layer on which i placed the background dark gradient. That is useful, because changing this background layer, would change all the artboard views in 1 click. I find this combination between the artboards and layers very effective to produce artwork.
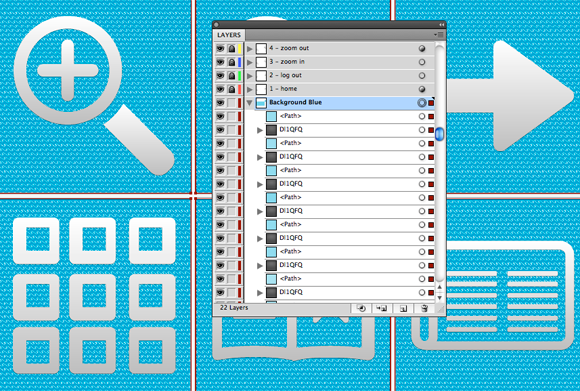
changing a background color on a separate layer will change all artboards in 1 click
Name each artboard differently, so that in the end, you remember which icon belongs on which artboard. I did the same for the layers. This will be useful when later, we export these artboards into different files for import into Photoshop.
In this case, i made 20 different icons, so i had 20 artboards that i exported into PNG's. Pay attention to the dialog box when exporting: here you have the possibility to check which and how many artboards you want to export: check the checkbox next to "Use Artboards" and choose "all" or "a range" (in my case between 1-20). Choose which format you want to export your artwork, i choose PNG.
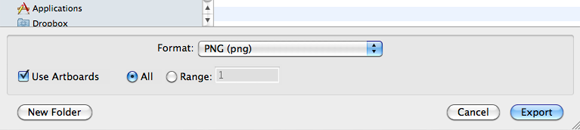
choose all or a range of Artboards
Once you choose your Artboards range, the next dialog box is the one that asks the export format options, in my case PNG. The destination is sceen, so i choose "screen", you have the ability to choose another background and anti-aliasing (artwork optimized) and interlace options (leave it unchecked). Make sure you have a folder for the exported PNG's and point to it for the saved versions. As you will notice, the files are saved by the Artboard names you gave them earlier with the extension PNG. This is excellent and now we're ready to import them into Photoshop.
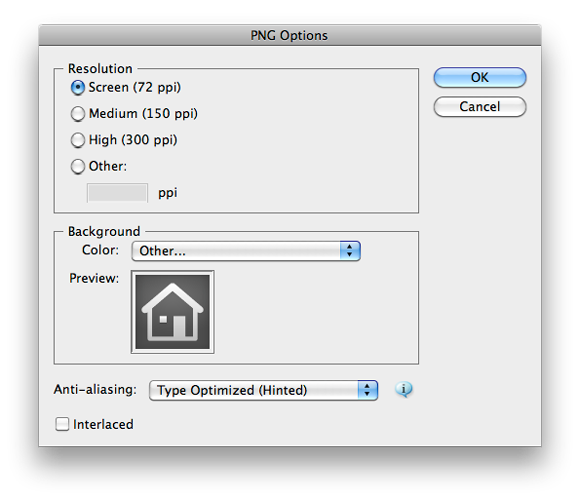
PNG options while exporting for screen
Automation in Photoshop
Open 1 saved PNG in Photoshop. First, we'll make 1 action and save this action before we do the same for the other formats.
- Open the Action palett e: Window > Actions
- Click the new action button at the bottom of the panel, a new action dialog will pop up
- Name the action: 36x36px
- Leave the Set: default Actions.
- Now we're ready to Record the action, scaling our artwork to 36x36pixels and do the export into png
- When click the Record button, you will see a red light circle in the bottom of the action palette, this indicates that you are actually recording your clicks
- Start by going into the Image menu > Image Size and change the dimensions into Width 36 and Height 36 pixels and click OK
- Next, choose File > Save for web & devices and choose PNG-24 with Transparency as Preset. Click Save and choose the ldpi folder we made earlier.
- At the bottom of the Action palette, click the Stop button, next to the Action button. You will see the different steps we made if you expand the action you just created in the Action palette.
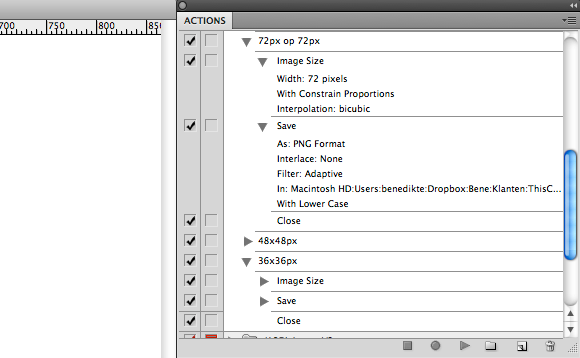
make 3 actions for export into different dimensions
Make 2 more actions, with the dimensions 48 x 48 pixels and 72 x 72 pixels.
You are now ready to automate the batch operation.
- Choose File > Automate > Batch
- In the Play section, choose the Default Actions Set and choose the actions you made earlier 36x36px
- In the Source section, choose the option: Folder and click Choose (the one with the exported PNG's from Illustrator)
- In the Destination section, choose Folder and then Choose: now point to the destination folder "ldpi" we made earlier in the assets folder.
- If you want to change the filenames, check the checkbox next to "Override Action Save As Commands", i left it unchecked because i want to keep the same filenames.
- Click OK and the batch will start
Do the same for the other dimensions and you'll have the other 2 folders mdpi and hdpi filled with the correct icons.

Automate the export

Connect